Showing posts with label EAD. Show all posts

Saturday, January 28, 2012

Before and After Project

Hi everyone!  I hope you are all having a fabulous Saturday.  For today's project I decided to make something for my craftroom.  I got a new cricut cartridge a few months ago and haven't even opened it up yet.  


Recipe:
  • Cricut Expression Cutting Machine
  • Word Collage Cricut Cartridge
  • 8 inch Square Frame
  • Vinyl- EAD Designs
  • Ribbon
  • Paper (any color/design would work)


I like that I stuck the vinyl on the glass that way if I want a different look I can just change out the paper.


Be sure to pick up some fabulous vinyl from EAD Designs for all your cricut crafting need:)

See you next Saturday with another fun vinyl project:)

Saturday, October 22, 2011

Let's play dress up with some vinyl

Happy Saturday Everyone!  I hope you are all having
a FABULOUS day!  I am super excited to share another
fun project idea I made using vinyl from
My sister and her husband just moved into a new
home this past month.  The walls were pretty bare
and boring and so hated it.  I decided to surprise 
her and dress up some of her walls with vinyl from 
I love all the fun vinyl decals, wall art, custom designs
that EAD DESIGNS offers.  There is something for
everyone.  Too many things to choose from :)

Anyways... I was so excited to surprise my sister
with some fabulous vinyl that I totally forgot my camera.
Good thing I have one in my phone :)  

Here is what we did.

BEFORE:
AFTER:
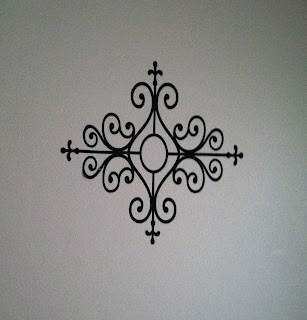
Check out the pretty WROUGHT IRON
vinyl decals here:

Tuesday, October 18, 2011

The Witch Is In- Vinyl Project

Happy Saturday Everyone!  I hope you are all having
a FABULOUS day!  I am super excited to share another
fun halloween project I made using vinyl from

I got a shower glass block at the home improvement store
and picked out one of the cutest Halloween decals from

It was so easy to put on the block, it stuck like a champ!
I LOVE this fun saying...my sister came over the other day
and asked if my hubby picked it out....  RUDE!!!!  LOL
Pick up your fun vinyl decals here:

See you next week for another scary project:)

Saturday, October 8, 2011

A Spooky Pumpkin Full of Guts

Hello everyone!  I hope you are all  having a FANTASTIC
October Saturday.  We are just trying to stay warm here in
Utah... youwould think Christmas was just around the corner
with all the snow on the ground.  Anyways, I still have a few
Halloween projects to share with you before I start the fun
Christmas ones.

My favorite thing ever this time of year is PUMPKINS!  I
love love love love PUMPKINS!  I am really not a huge
fan of carving pumpkins because it gets so cold here and they
don't last very long at all.  I like my pumpkins to last until
Thanksgiving.

So I was browsing that fabulous EAD Designs Website and
I found this darling vinyl pumpkin face!  YAY now my pumpkin
will last forever!
http://stencilwords.com/ocart/index.php?route=product/product&keyword=pumpkin&category_id=0&product_id=2495
I made sure my pumpkin was clean and dry before I
added my vinyl.  It turned out FANTASTIC!  I Love it:)


Check out all the fun vinyl decals to dress up your halloween
pumpkins here:  http://stencilwords.com/ocart/index.php?route=product/product&product_id=3518

Saturday, September 10, 2011

EAD DESIGNS: BEFORE AND AFTER

Happy Saturday Everyone!  I hope you are all having
a FABULOUS day!  I am super excited to share this
really fun project with you that I made using vinyl from

I got a shower glass block at the home improvement store
and picked out one of the darling Halloween decals from

It was so easy to put on the block, it stuck like a champ!
I LOVE this fun saying...  I don't know if the hubby likes
it (I have this stuck in my head and keep calling him that) LOL


Pick up your fun vinyl decals here:

See you next week for another scary project:)

Saturday, September 3, 2011

It's that time of year!!!!

Hello everyone!  I hope you are all having a fabulous Saturday!
We are sure staying busy working on our house.  It seems like
that's all we did all summer and it made the months go by extra
fast.  In May we were praying for no more SNOW!!!  No we
just hope it starts to get cooler... 
Anyways, I get so excited every Labor Day because I start
to decorate for Fall and Halloween!  Early- I know...  This is
my FAVORITE time of year!!!! 
I am extra excited because EAD Designs has the CUTEST
vinyl decals ever!  Great for your fall crafting projects.  I seriously
want EVERYTHING in the store! 

I wanted to kick off this month with a fun and easy fall craft using
a tile.  You can pick up these tiles for under $1 at almost any home
improvement store.

I simply cleaned off the tile- making sure there was no more dust
and dirt on it so the vinyl will stick well.

I added some fabulous vinyl from EAD Designs found here:
http://stencilwords.com/ocart/index.php?route=product/product&keyword=thankful&category_id=0&product_id=1444

and tada:


I LOVE LOVE LOVE it!  I am so 'thankful' for EAD Designs!

Saturday, August 27, 2011

Let's Dress Up A Wall

Happy Saturday Everyone!!!  I hope all of you are having a
fantastic day.  Today my hubby got called into work and
that means...  Major Craft Day For Me:)  I am excited to share
Halloween projects with you in September.  I will be dedicating
the every Saturday in September to Halloween decorations.
I have some really exciting things planned and can't wait to show
all of you!

Anyway...
This week was a little sad for me.  My lil sister went
back to school.  I decided to surprise her with a
new wall decal I put in her room when she got home.

I have been eyeing this really cute wall decal by EAD designs for months now.
I decided now was the perfect time to pick it up and surprise the lil sis.
I found the perfect place on her wall for it!


It turned out ADORABLE!  I hope she
loves it as much as I do!  This is the
perfect wall decal for any little girls room.

EAD Designs also has some fantastic instructions
to make your wall decals perfect.
*****
Vinyl Lettering Application Instructions


1. Surface Preparation
Use a tape measure or ruler to determine the exact
area where the quote/graphic will be placed. It is a
 good idea to draw a horizontal line, or use masking
 tape or painters tape for a guide. Make sure your
 surface is clean and smooth.
The vinyl can be installed just about anywhere you
want to put them. Painted walls (light and medium
 texture work fine, including knock down and
orange peel) ,wood, furniture, ceramic tile, metal,
 glass, porcelain, painted brick, wallpaper,
bathroom sinks, showers, doors, hardy plank,
 mail boxes, and much more.

2. Prepare Quote
Some quotes/graphics will come rolled up because
of the length. Unroll and let it sit flat until it stops trying
to roll itself up again. The vinyl is sandwiched between
transfer tape and backing. You want the vinyl to stick
to the transfer tape.
Before peeling the back paper off, burnish (rub) the
surface of the transfer tape to ensure the vinyl is
adhered solidly to the transfer tape. (letters may
pull away from the transfer tape during shipping)

3. Application
Flip the quote/graphic over a carefully peel the
backing away from the quote on an angle, which
should remain on the transfer tape. If some of the
vinyl sticks to the backing, replace the backing
and the vinyl to the tape and rub it again so it
sticks to the transfer tape instead.
Place the taped vinyl on the prepared surface
using your guide or tape to position your vinyl
correctly. *The quote cannot be repositioned
once it is on your surface, so be careful to
line it up where you want it.

4. Burnishing
Using the application stick or credit card carefully
 and press any air bubbles out from underneath
the words. Burnish again and apply more pressure
over the entire area.

5. Transfer Tape Removal
CAREFULLY peel back the transfer tape on an
angle leaving the vinyl on your surface, If the vinyl
tried to come up with the transfer tape, place the
tape back on the surface and burnish that area
again until the vinyl sticks to your surface.

********
Doesn't that sound super easy!  Make sure
you go check out EAD Designs today and
get some cute wall decals!

Saturday, August 13, 2011

Wedding Decor/Gift

As summer is starting to come to a close, I wanted to share
a project I made for a summer wedding we attended.  This
summer has been super crazy busy with lots of weddings.
I made this fun wedding decoration for a friend to display at
the wedding as well as keeping it as a keepsake for their special
day.  I absolutely love this saying!
To create this all I did was:
*Purchase a frame
*Found some scrapbook paper
*Added some fabulous vinyl from EAD Designs

Be sure to stop by EAD Designs for some vinyl
for all your decorating needs!
http://www.stencilwords.com/ocart/

See you next week!

Friday, August 12, 2011

Let's Get Detailed

Hello Everyone!  I hope you are having a fabulous day!
I am excited to share a very "detailed" project with you.

If you are anything like me, you love and need details to everything.
It drives me crazy when I ask my DH a question hoping to get a
little morethan his usual one word answer...

  I NEED DETAILS...

Well this project is going to start from UNDETAILED to DETAILED...

I had my hubby cut me some wood and had it sanded and then painted

I added some FABULOUS vinyl from EAD Designs
Yes, this is cute just the way it is but I need MORE details  ;)

So I added some distress Ink on the edges for an older/worn look
 Then I added some bling and tulle.
Now that's detailed:)
Be sure to visit the EAD Designs shop and pick up
some vinyl for your next detailed project:)
http://www.stencilwords.com/ocart/
See you next week with another fun home decor project!

Saturday, July 23, 2011

Treat Tin- EAD Designs

Hello Everyone!  I hope you are all having a fabulous Saturday!

I am excited to share a quick project with you today.

Remember when I did the project with my white canisters and product from EAD designs?  If not, you can check out that post here

Anyways, there was a few more labels that I didn't use for that project.
There is a really cute label for TREATS.
I have been thinking for a while something that I could use this tag before.

I decided to make a little treat canister for the Sundays School Children I teach at church.
I picked up a cute tin from Target for $1.00

I added the cute TREAT tag and some embellishments to make it extra fun.

Now I just need to find some yummy treats to fill it with. 

Saturday, July 16, 2011

A QUICK gift idea for EVERY occassion

Hi everyone! I hope you are having a fabulous Saturday!
I have a very quick and fun project for you today.
If you are anything like me, you always do things last minute.
It drives my DH crazy... it actually drives me crazy too!

Well this past week me and the DH were in Lowes picking up some "manly" tools.
I am a total wanderer and try to keep myself entertained while the DH spends what
seem like hours looking around at the newest and coolest tools...

I decided to go check out the floor covering area
and came across some fun little 4 inch tiles for only $o.33
WOOT WOOT

I had a fun idea pop into my head-
'Why not get a bunch of these and make gifts for weddings, birthdays, holidays...'

I remembered seeing some vinyl sheets on the EAD Designs website when I was browsing the day before. I knew I had the best idea for quick gifts ever!

I ordered some vinyl and pulled out my cricut- picked an image and went to work.
And TADA!


I made these fun tiles! They would be great for coasters or just a decorative piece.

Want to make some tiles like these?
*Next time you are shopping with the DH for the "coolest" tools, pick up some tiles.
*Order some Fabulous Vinyl Sheets from EAD DESIGNS:
http://stencilwords.com/ocart/index.php?route=product/category&path=37_52

And you are all set for those quick last minute gifts.

Saturday, June 18, 2011

The stroy of a Hoarder and a $1 Frame

Hi Everyone! I hope I didn't scare you off with
the title of this post...

I am a little addicted to the tv show hoarders, actually
I'm obsessed. For some reason if I am not in the mood to
clean my house, I turn on the show and IMMEDIATELY I start to
clean and junk all the things that I don't use or need.

I have a little confession... I am a hoarder when it comes to
my craft supplies. I some how feel the need that I need all the
newest paper packs, tools and embellishments my little craftroom can fit.
I would say 70% off the paper packs and embellishments are still in the package the way
 I purchased them. I always think for every new project I
make I need to go buy all new supplies.


This week I went to Micheals and bought a $1 wood frame. After browsing the scrapbook section for products to use to embellish my frame, I decided
it is time for a change. I no longer want to become a Craft Hoarder!!!!
I went to the checkout with only the frame in my hands and handed it to the cute girl at the counter who was been my cashier many many many times.

I could tell by the look on her face that she was in shock too... My usually purchase of $50+ was only $1.06.

I went home set my frame on the craft desk and started browsing through my supplies and here is what I came up with.


Products Used:
$1 Wood Frame from Micheals
Paper from Kassidys HUGE unopened stack
Tim Holtz Ink
Prima flowers that I had to have a couple months ago
*Vinyl from EAD Designs (I love this vinyl, and the people at EAD Designs are so fast with creating and shipping whatever I need done)

Thanks to the show Hoarders and EAD Designs I am one step closer to getting over my addiction!
... I think....

CHECK OUT THE EAD STORE:
http://www.eaddesigns.com/

CHECK OUT THEIR FANTASTIC BLOG:
http://stencilwords.com/blog/

Saturday, June 11, 2011

Be You- EAD Before and After

Hi Everyone!  I hope you are all having a fabulous day!
The past few weeks have been a little crazy around here. 
Last week our computer decided to "kick the bucket"
 and take all my files with it. 

 Yes, I now know how important it is to save files
 and pictures to another area....

Last week was my lil sisters last day of school. 
 She spends a lot of time with me each summer because
 both of my parents work and I guess I am a
free babysitter LOL.

About 2 weeks ago I was browsing the EAD website
 trying to decide what fun projects I
wanted to make with vinyl this summer. 
My sister was over here and begged and begged to
pick something out for her room. 
After HOURS AND HOURS of changing her mind, she
found the perfect vinyl decal for her room.

So we changed this semi boring wall....

To something unique and fun...

Thanks EAD for keeping my little sister busy for a few hours trying to find the perfect place
for her new wall decor!  We love it!

CHECK OUT THE EAD STORE:


CHECK OUT THEIR FANTASTIC BLOG:

Friday, May 27, 2011

You "Bake" me Happy:)

Hi Everyone and Happy Saturday!

I have a really "yummy" project to share with you today.
You all know how I like to add a little pizzaz to plain jane things...
Today the Kitchen Aid got a little makeover.
I was so excited to see that EAD Designs had a fun subway art decoration fit for my Kitchen Aid.

It was so simple to stick on. 
Let me tell you something about this vinyl...
I have worked with other vinyl before that was not the best quality, it gets so frustrating.  Not the vinyl from EAD, it is awesome to work with.


I was so excited to have the finished product!  To celebrate I made
a delicious batch of banana bread:)

Thanks EAD Designs for my Kitchen Aid makeover
and for
Baking Me Happy:)

CHECK OUT THE EAD STORE:

CHECK OUT THEIR FANTASTIC BLOG:

Saturday, May 14, 2011

Before and After with a Little Pizazz

Hi Everyone and Happy Saturday!

I have been so super excited to share some fun and exciting news!  I am the new Before and After Girl over at EAD Designs!
I’m so excited to share my first Before and After project with you today.
 I am one of those crazy girls who can never leave things plain, I always need to add a little pizazz! I’ve been wanting to make over these
plain jane canisters.


After browsing the EAD store, I came across this beauty and the heavens began to sing.


I was so thrilled the way these canisters turned out!  It is so much fun how a little label can turn something DRAB TO FAD!

 A HUGE thanks to EAD DESIGNS for helping me turn my boring canisters into something special!  Love it:)
CHECK OUT THE EAD STORE:

CHECK OUT THEIR FANTASTIC BLOG: